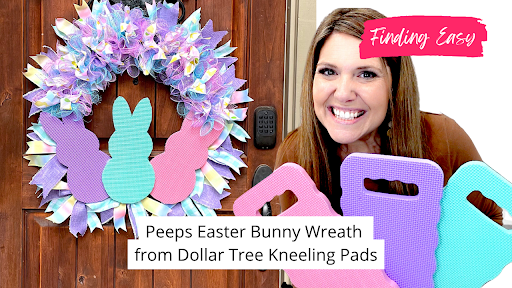
20 Apr Easter Decor: How to make a quick and easy Peeps Bunny Wreath
Make A Quick & Easy Peeps Bunny Wreath
Welcome to another thrilling installment of our craft blog on Finding Easy, a platform where we continuously explore and share easy life hacks, affordable DIY decor, and creative ideas to simplify your life and add a touch of creativity. Today, we’re setting the stage for another endearing Easter-themed project – crafting a Peeps Bunny Wreath. This project is not just about creating an attractive piece of holiday decor, but also about spending quality time, engaging your creativity, and experiencing the joy of crafting something beautiful with your own hands.
The most exciting part of this project? It’s a Dollar Tree hack! By sourcing materials from Dollar Tree, we ensure this project remains affordable and accessible to everyone, regardless of budget. Crafting doesn’t have to be expensive; it’s all about using resources wisely, being innovative, and letting your imagination run wild.
To kickstart this project, you’ll need my free downloadable template.
This template is designed to make your crafting process as smooth as possible. It’s user-friendly and requires minimal effort – simply download, print, and trace your Peeps on a Dollar Tree kneeling pad. The kneeling pad, typically found in the garden section, is a perfect example of how we repurpose everyday items in our crafts. It’s about seeing the potential in ordinary items and transforming them into something extraordinary.
Using this template, you’ll be able to create adorable Peeps that are consistent in size and shape, ensuring your wreath looks professional and well-made. Remember, the key to a successful DIY project lies in the details. And with this template, you can rest assured knowing your peeps will be perfect every time.
So, whether you’re an experienced crafter or a beginner embarking on your first DIY project, this blog post will guide you through each step, making the process enjoyable and stress-free. Not only will you end up with a charming Fluffy Bunny Wreath to brighten up your Easter decor, but you’ll also gain the satisfaction of having created it yourself. Let’s dive in and start crafting!
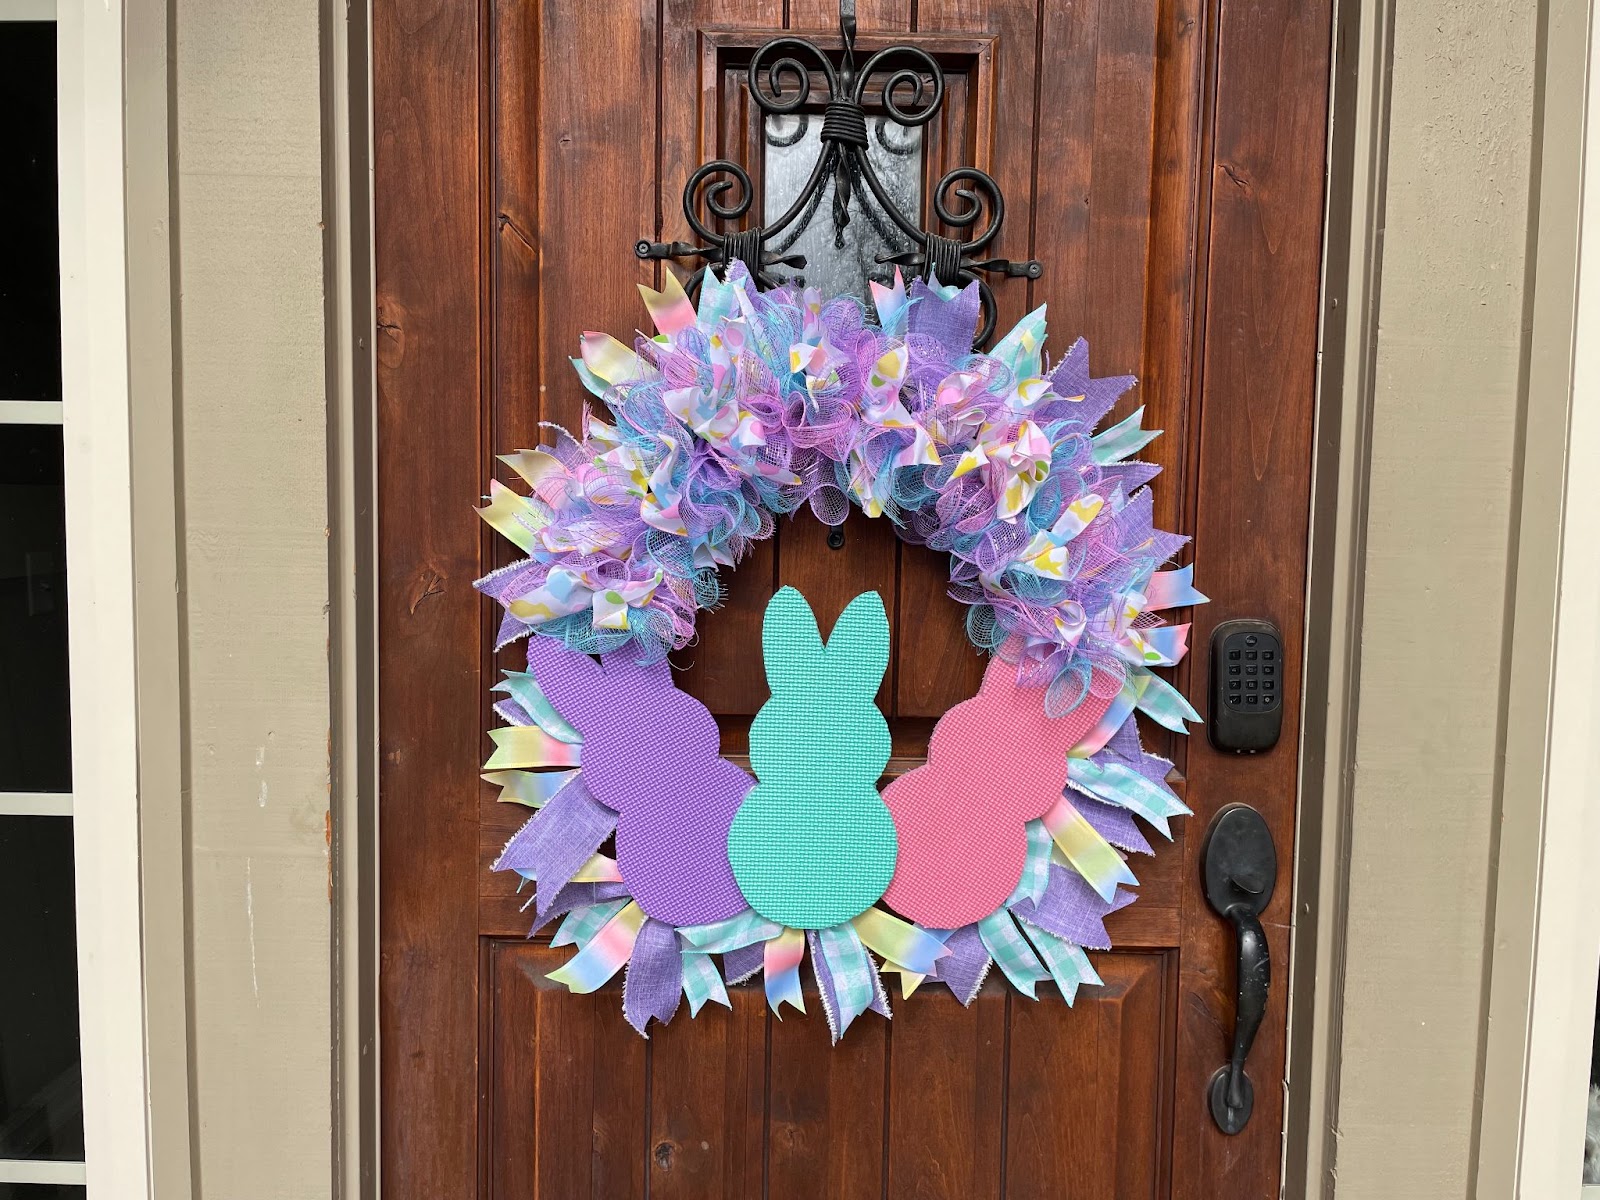
In addition to the adorable peeps, our wreath will also showcase beautiful ribbons and mesh. These elements add texture and color to our project, making it eye-catching and festive. I found these materials at Dollar Tree, a testament to the fact that you don’t need to break the bank for crafting supplies. Even on a budget, you can create something truly beautiful.
Additionally, we’ll be using an 18-inch wreath frame for this project, which I conveniently picked up from Walmart. This size is perfect for our Peeps Bunny Wreath, as it provides ample space for our peeps, ribbons, and mesh to shine, while still being compact enough to hang on your door or wall.
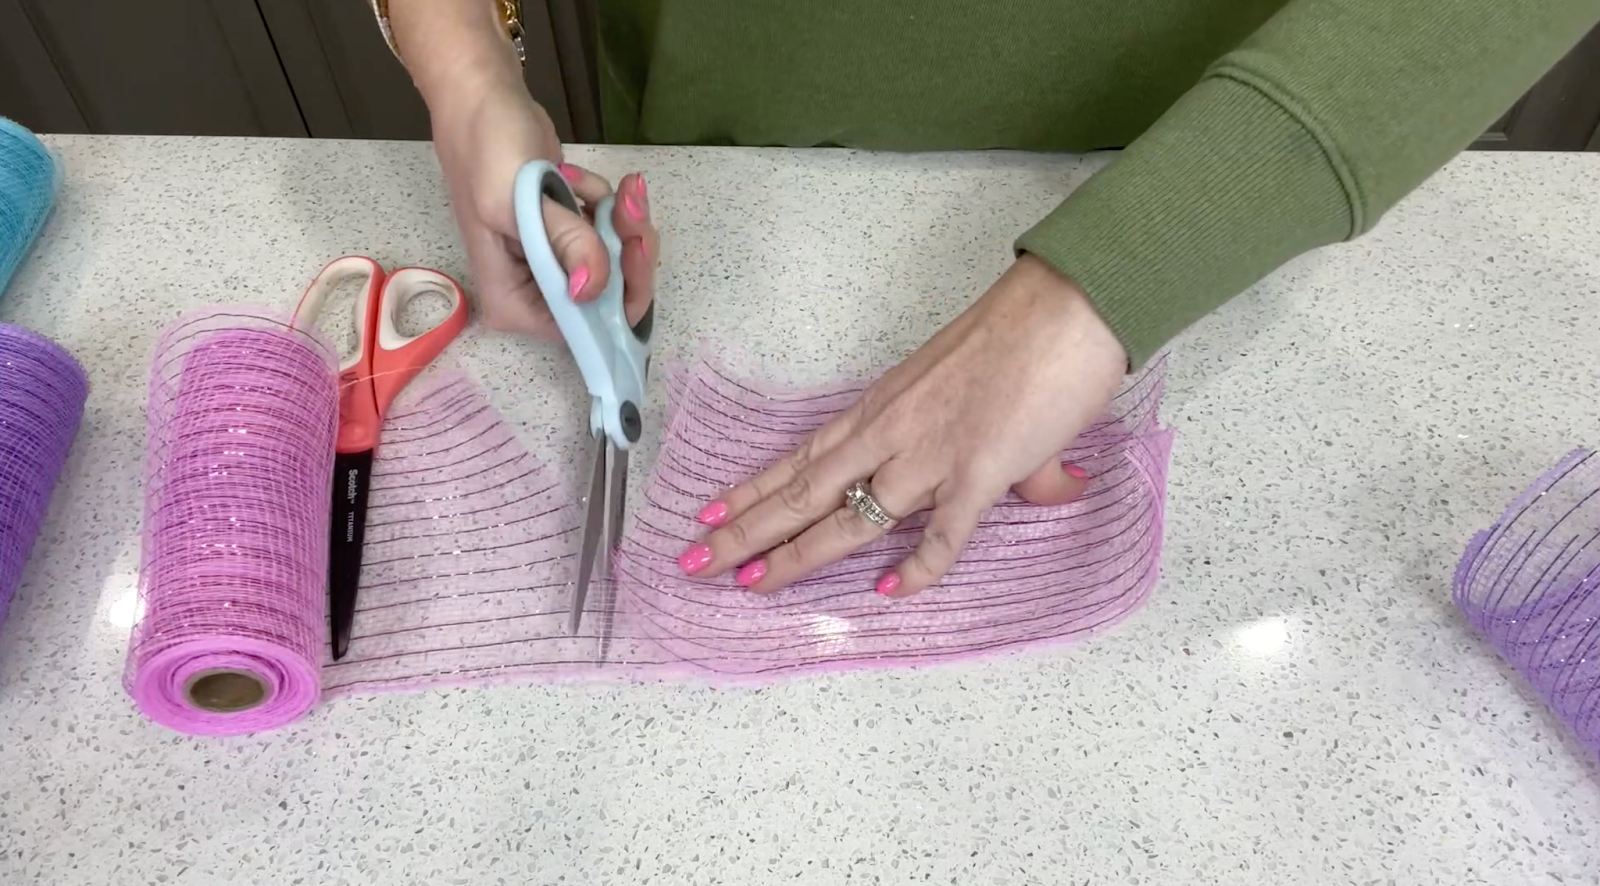
The first step in our crafting process involves preparing the mesh. We’ll cut it into approximately 9-inch sections. Once cut, we scrunch up each piece to create small, fluffy poofs. These poofs will give our wreath a soft and voluminous look, making it even more appealing.
Next, we’ll measure and cut our ribbon to match the length of the mesh sections. The ribbon will be mixed in with our mesh poofs, adding a pop of color and a touch of elegance to our wreath. The combination of mesh and ribbon creates a delightful visual contrast, enhancing the overall aesthetic of our project.
This process involves layering different colors of mesh and ribbon, creating a vibrant and varied palette that’s perfect for Easter. We’ll then bundle these layers together using a white pipe cleaner. The pipe cleaner not only secures our layers, but its white color blends seamlessly with the mesh and ribbon, maintaining the clean, cohesive look of our wreath.
In crafting, every detail matters, and in our Fluffy Bunny Wreath, the combination of mesh, ribbon, and pipe cleaner transforms simple materials into a lovely piece of holiday decor. Follow along as we continue to bring our Easter wreath to life.
Assembling the Wreath
With our materials prepared, we move on to the next crucial step: assembling our Easter wreath. This part of the process is like piecing together a puzzle, where each element finds its perfect place on the frame.
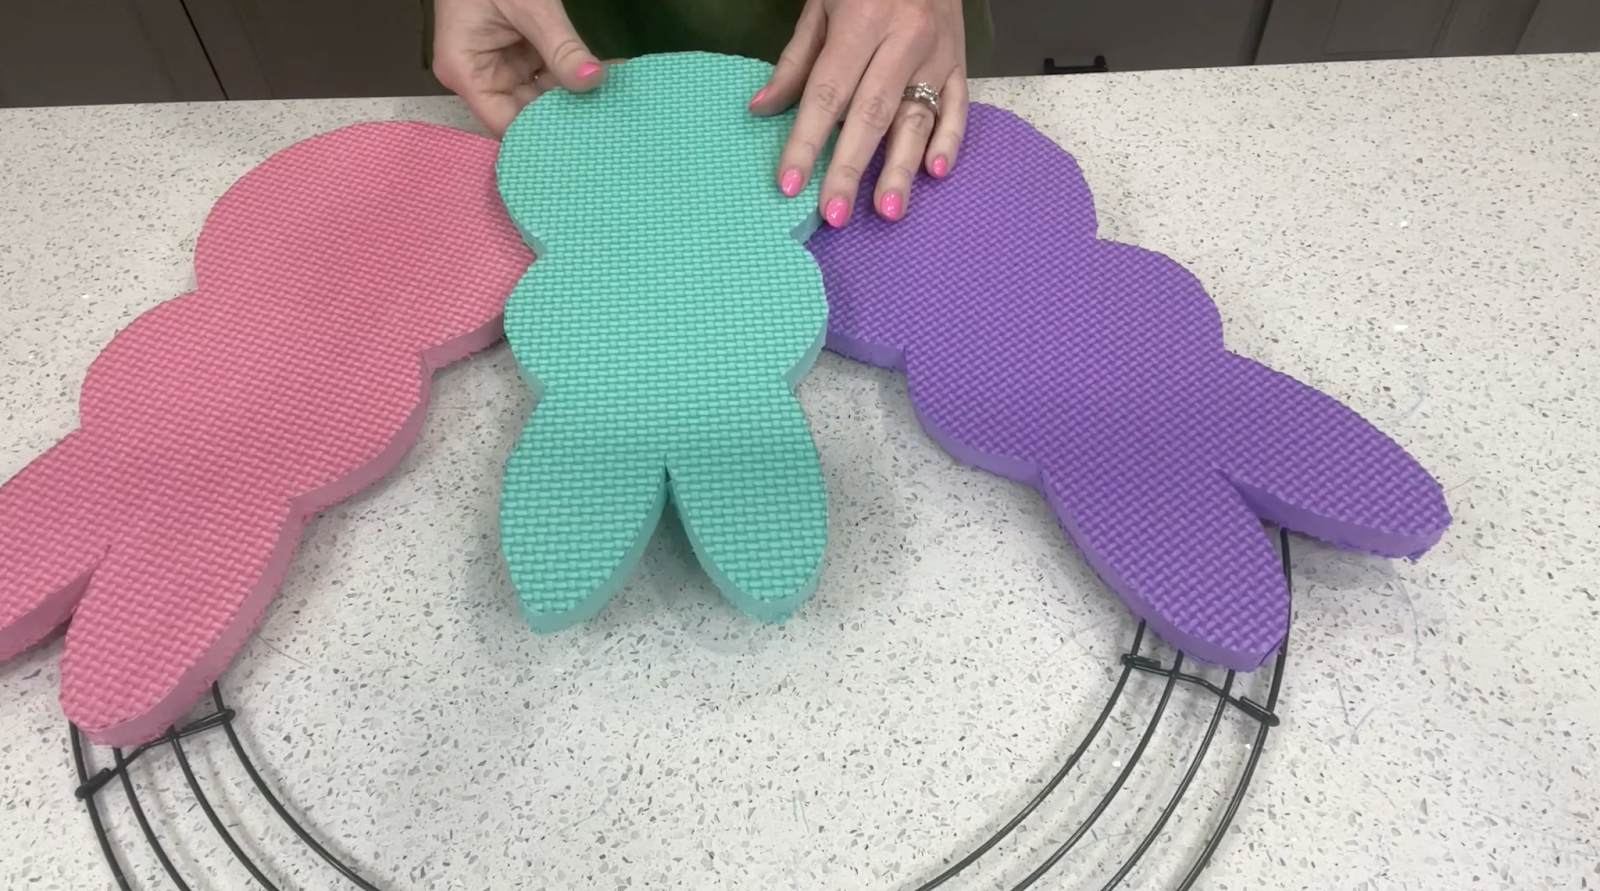
We begin by positioning the peeps on the wreath frame. These colorful characters will serve as the focal point of our wreath, drawing attention with their vibrant colors and whimsical charm. Arrange them on the frame before adding any poofs to ensure the design is balanced and visually pleasing. It’s about creating a blueprint for your wreath, and setting a clear plan for where each element will be placed.
Once we’re happy with the design, we start attaching the mesh poofs at the top of the wreath. This is done using the excess pipe cleaner to secure the poofs to the frame. By starting from the top and working our way down, we ensure a smooth and even distribution of poofs, creating a fluffy, cloud-like texture that contrasts beautifully with the peeps.
Next, it’s time to secure our peeps onto the wreath frame. Since they’re lightweight, hot glue is the ideal adhesive to keep them in place. If you’re new to crafting or a bit hesitant about this step, don’t worry. My free tutorial and downloadable template offer easy-to-follow instructions, ensuring your success in crafting these adorable peeps.
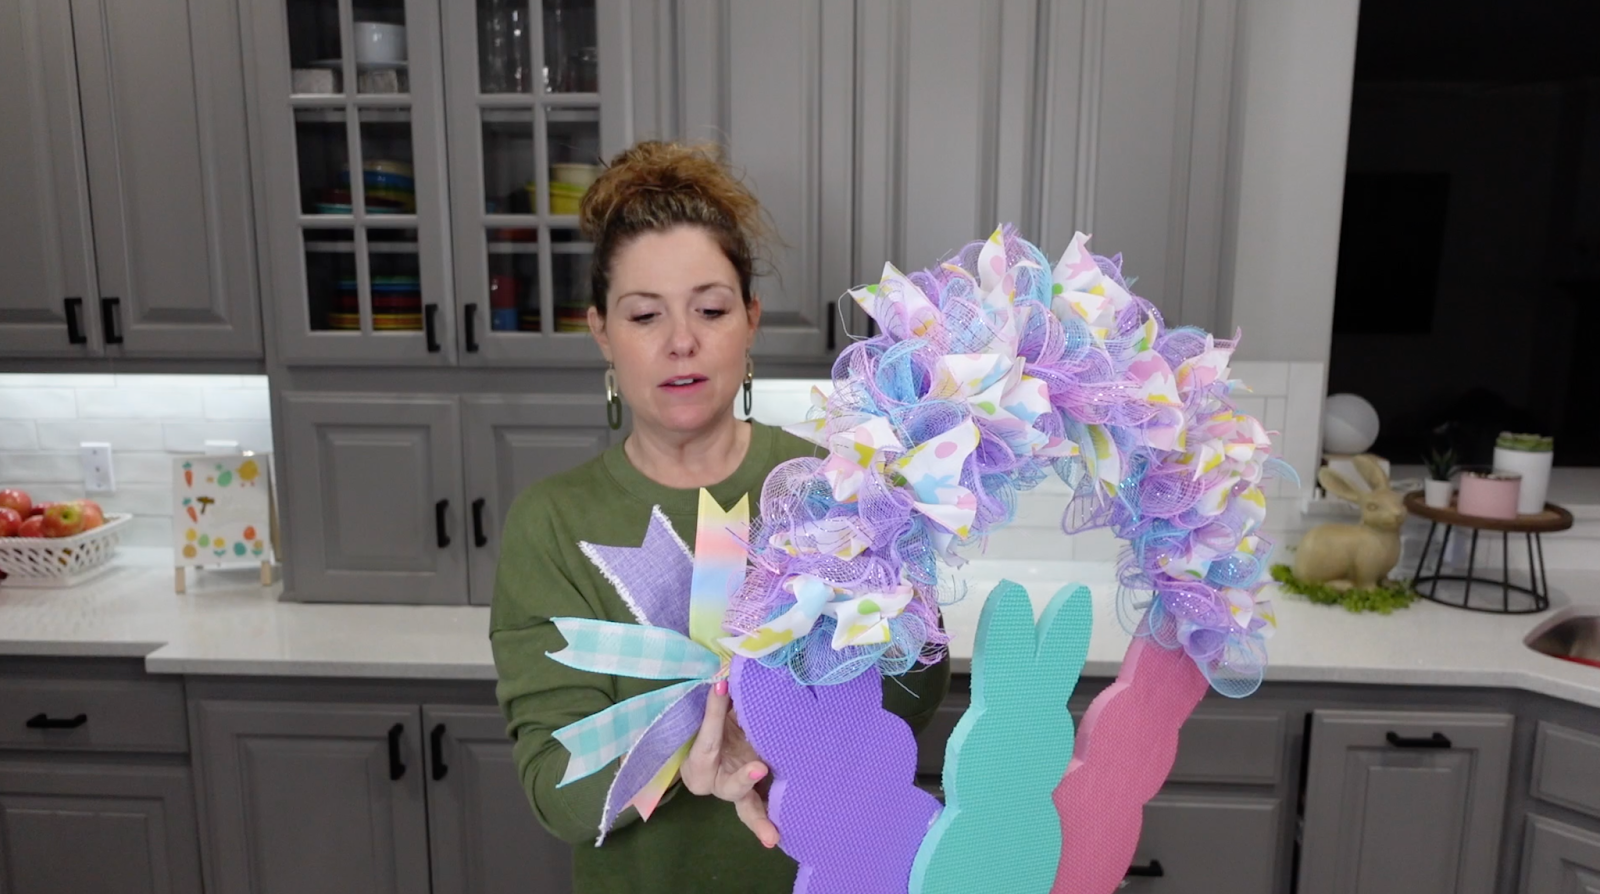
Then, we turn our attention to the ribbons. We cut 2.5-inch and 1.5-inch ribbons into 12-inch pieces and arrange them into small fan shapes. These fan-shaped ribbon bundles add an extra layer of texture and color, enhancing the overall design of our wreath. We attach these bundles to the outer edge of the wreath, creating a festive, ruffled border that frames our peeps and poofs.
At this stage, our wreath features a lovely combination of elements: the soft, fluffy mesh and ribbon poofs at the top, the colorful peeps at the bottom, and the fan-shaped ribbon bundles around the edge. This layout creates a balanced, full look, ensuring our wreath is visually appealing from every angle.
Remember, crafting is all about enjoying the process and letting your creativity shine. So, whether you’re following this guide exactly or adding your own personal touches, the most important thing is to have fun and create something you’re proud of.
And there we have it! You’ve now successfully crafted a delightful Peeps Bunny Wreath to adorn your home this Easter. This project is more than just creating an attractive piece of decor; it’s about the joy of crafting, the satisfaction of creating something with your own hands, and the excitement of transforming simple, affordable materials into something beautiful and festive.
Crafting this wreath is not just a creative adventure but also a journey of discovery. It’s about exploring your artistic side, learning new skills, and realizing that you can create beautiful things even out of ordinary materials. From cutting the mesh and ribbon, and arranging the peeps, to attaching the poofs and fan-shaped ribbon bundles, every step of this process has been a testament to creativity and resourcefulness.
This Peeps Bunny Wreath is proof that you don’t need to spend a lot to add a festive touch to your home. With materials sourced from Dollar Tree and Walmart, this project was both budget-friendly and fun. It’s a perfect example of how you can make stunning decor items without breaking the bank. Plus, it’s a great way to engage kids in a creative activity, teaching them valuable skills while having fun.
Remember, the goal here is not perfection but enjoyment. It doesn’t matter if your wreath looks exactly like the one in the tutorial or if it takes on its own unique form. What matters is that you enjoyed the process, learned something new, and ended up with a product that you’re proud to display in your home.
As we wrap up this blog post, I hope you’ve gained not just a beautiful Easter wreath but also a renewed sense of confidence in your crafting abilities. Don’t stop here; continue exploring the world of DIY and crafts. There are countless other projects and Dollar Tree hacks waiting for you to discover.
Thank you for joining me on this crafting journey. Remember, creativity knows no bounds. So, keep experimenting, keep learning, and most importantly, keep crafting. Let’s continue to make our lives more vibrant, one DIY project at a time. Happy crafting!
Sorry, the comment form is closed at this time.