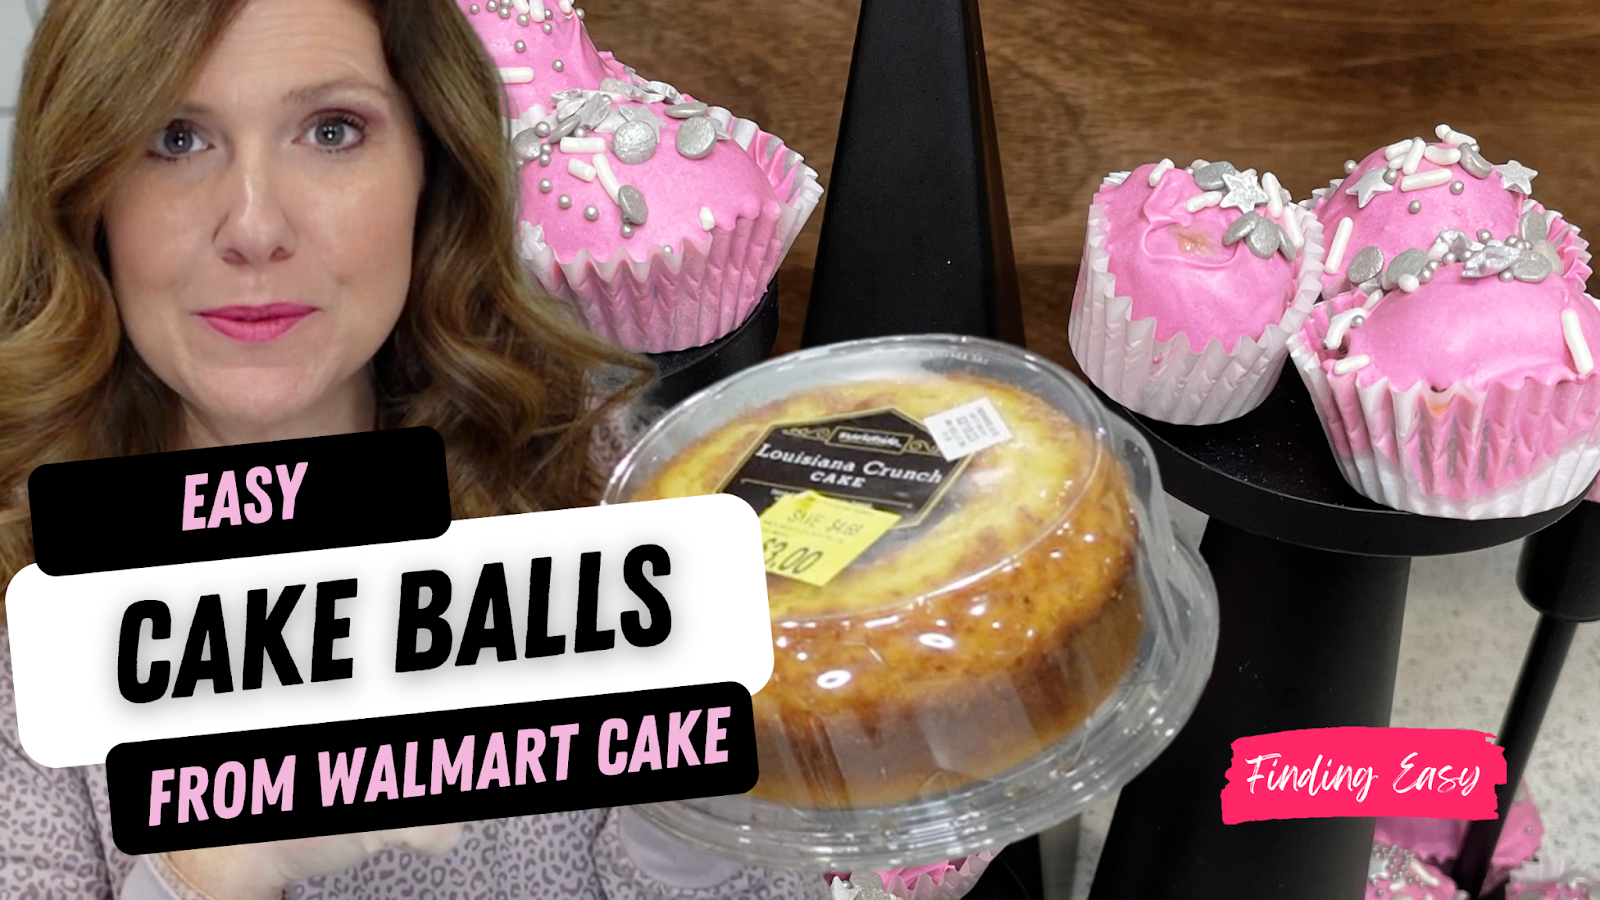
20 Aug Easiest Cake Balls Ever- from Store Bought Cake perfect for Baby Shower
Introduction
Are you in the mood for a yummy and visually appealing dessert that requires minimal effort? Look no further, as today, I’ll share with you a simple yet creative recipe to transform a store-bought cake into a batch of colorful cake balls. Today, I have the most simple yet ingenious recipe to share with you – a quick dessert hack using store-bought items that will be transformed into something truly extraordinary!
Are you curious about the secret to achieving picture-perfect cake balls? It’s all about technique and creativity. I’ll walk you through the process step by step, from rolling out those delectable cake-icing spheres to dipping them in creamy, dreamy candy melts. But wait, there’s more – to truly make these cake balls your own, we’ll be adding a splash of color using the mesmerizing Wilton Gel Food Coloring. Get ready to let your imagination run wild as you craft a kaleidoscope of colors that will bring a smile to any face.
From Clearance to Culinary Creativity
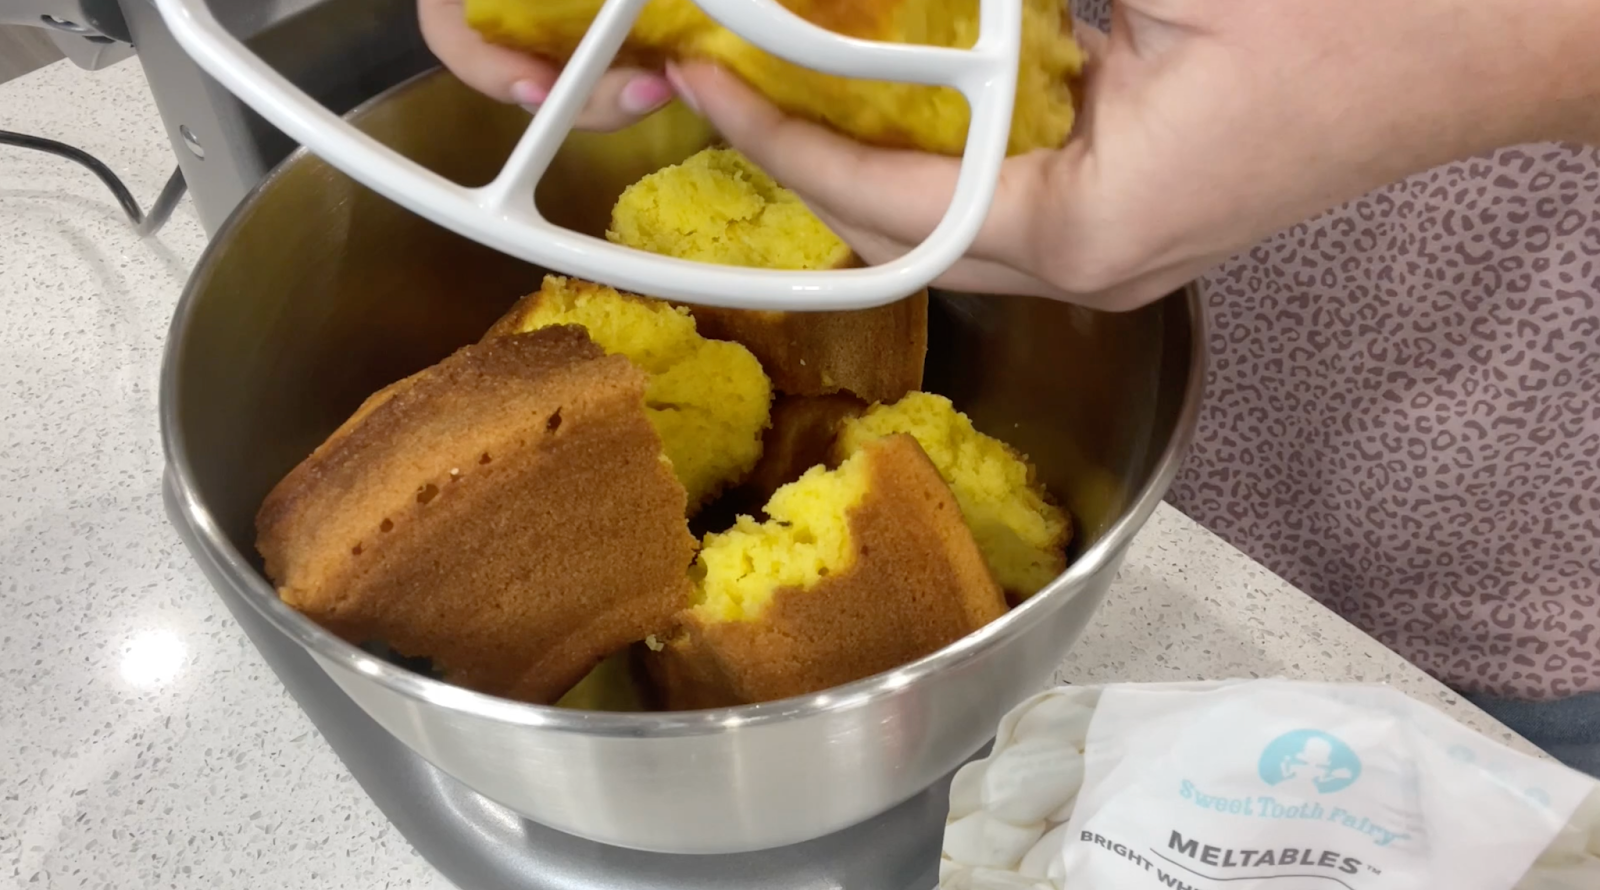
Our journey begins at Walmart, where an encounter with the clearance section of the bakery led me to discover the Louisiana Crunch cake. While any cake will work, this discounted find intrigued me, and I decided to give it a whirl. Of course, you can choose your favorite cake or even bake one from a box if you prefer. The key is to have a cake that speaks to your taste buds and fits your budget.
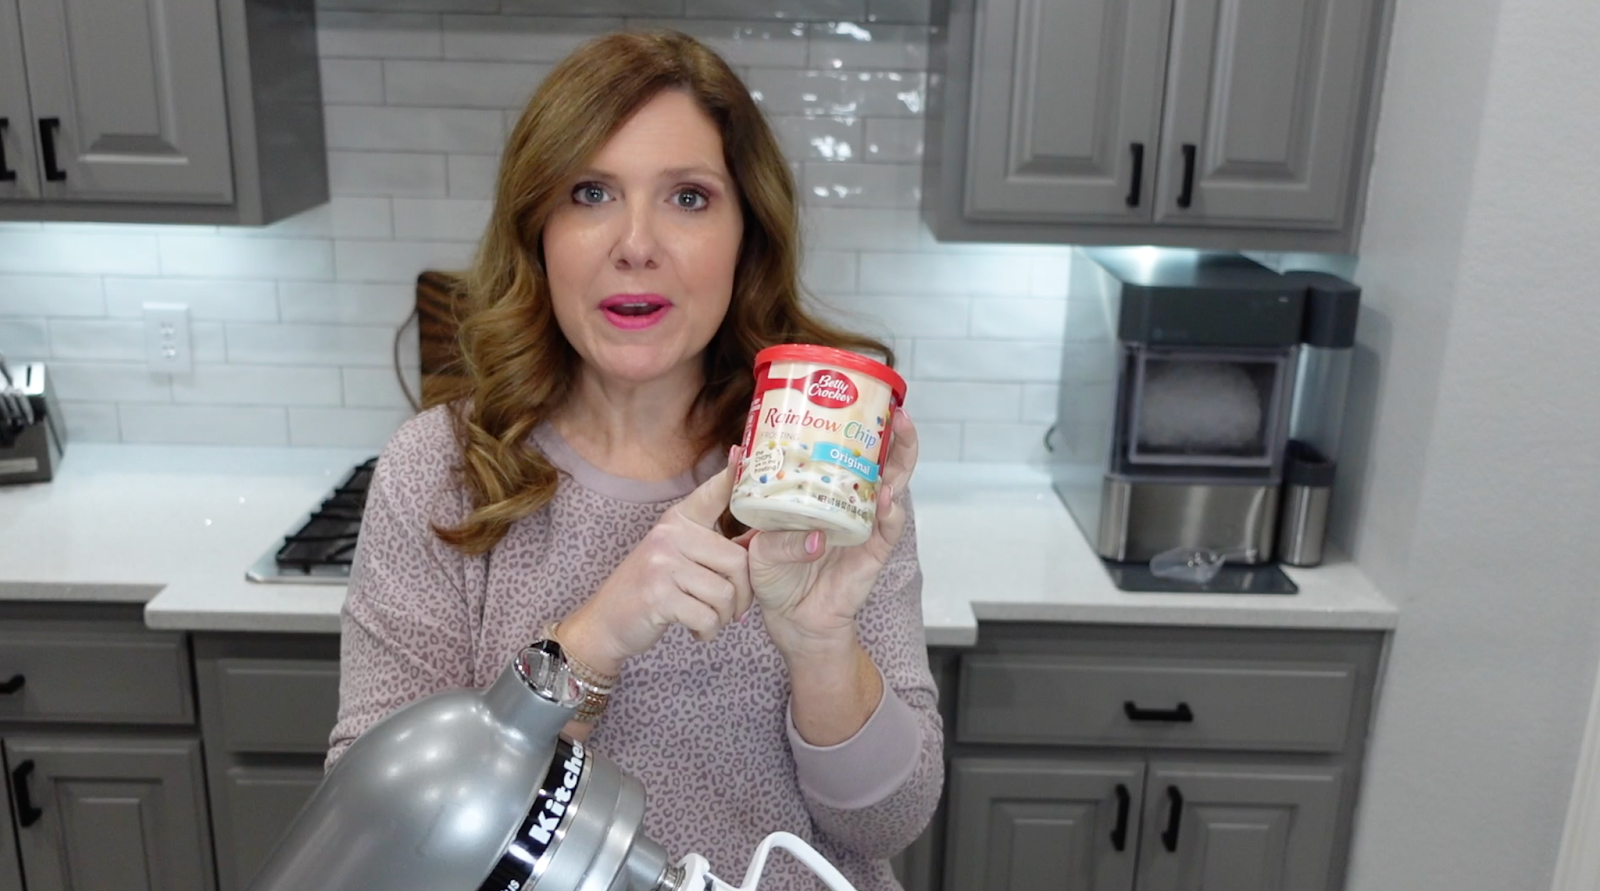
Next up, a container of rainbow chip icing. A beloved favorite among my kids, this icing brings a burst of colors and a delightful sweetness to our cake balls. I added about half of the icing into a mixing bowl with the cake, and with the help of my trusty standing mixer, I blended the two until they became a sticky, moldable consistency.
Rolling and Dipping
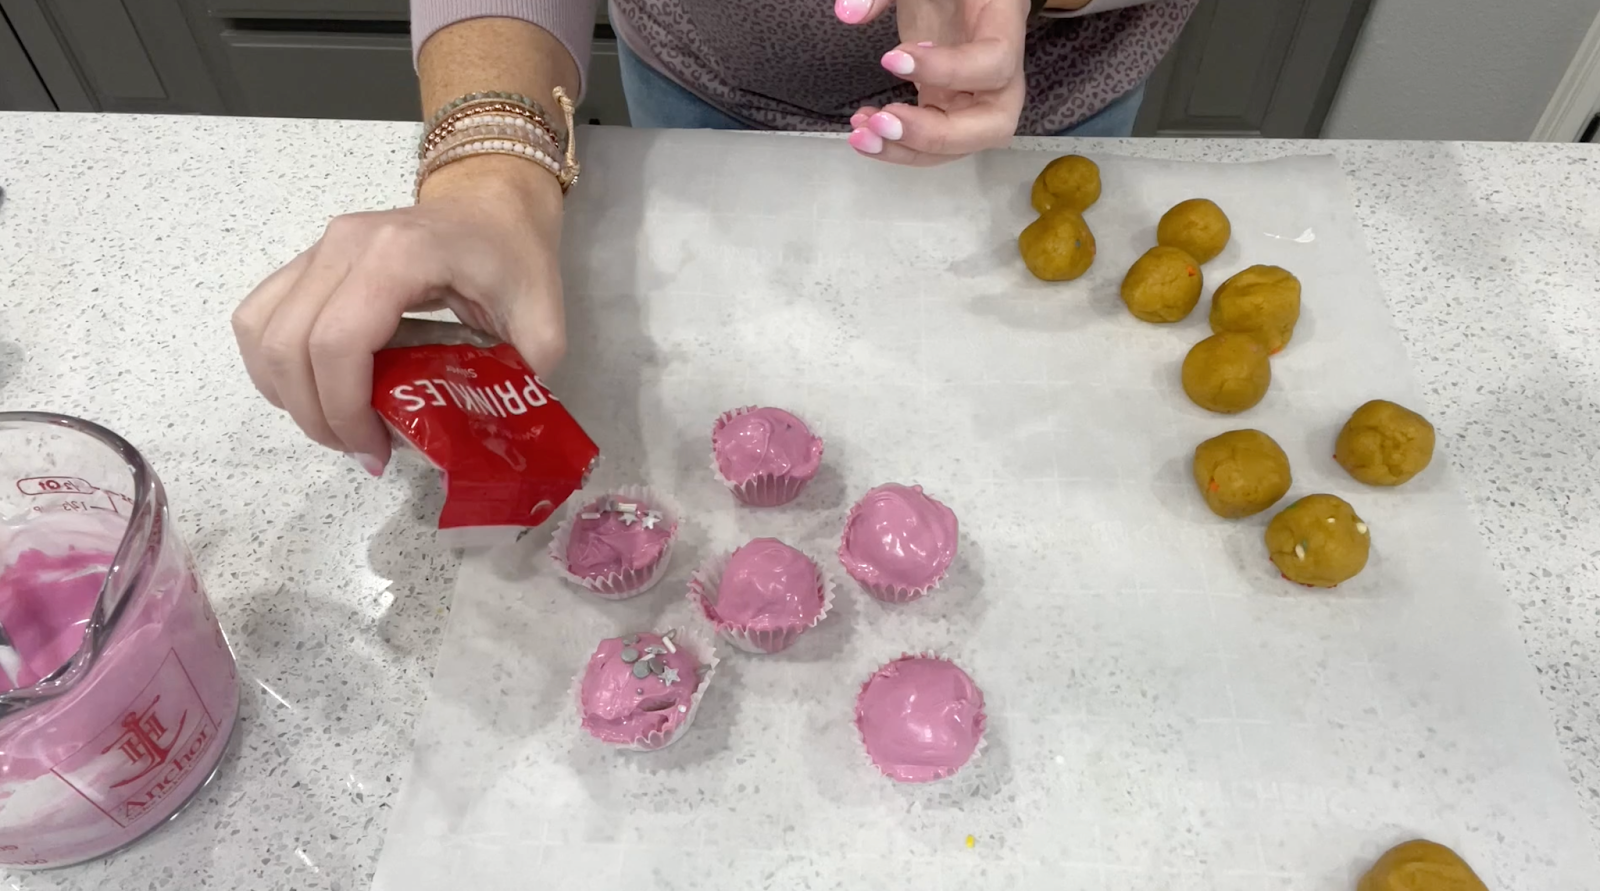
To create the perfect texture for our cake balls, I rolled out small spheres of the cake-icing mixture and placed them on parchment paper to prevent sticking. The size of the balls is entirely up to you; larger or smaller, the choice is yours. But remember, the smaller they are, the more of these delectable treats you get to indulge in!
Now comes the exciting part – dipping our cake balls in candy melts. I picked up some bright white candy melts from Walmart, and after a few microwave intervals, the smooth and creamy consistency was ready to go. To add a splash of color and personalize our cake balls, I opted for the Wilton Gel Food Coloring. These vibrant colors turn the simple cake balls into visually striking and Instagram-worthy treats.

A Splash of Color and a Sprinkle of Joy
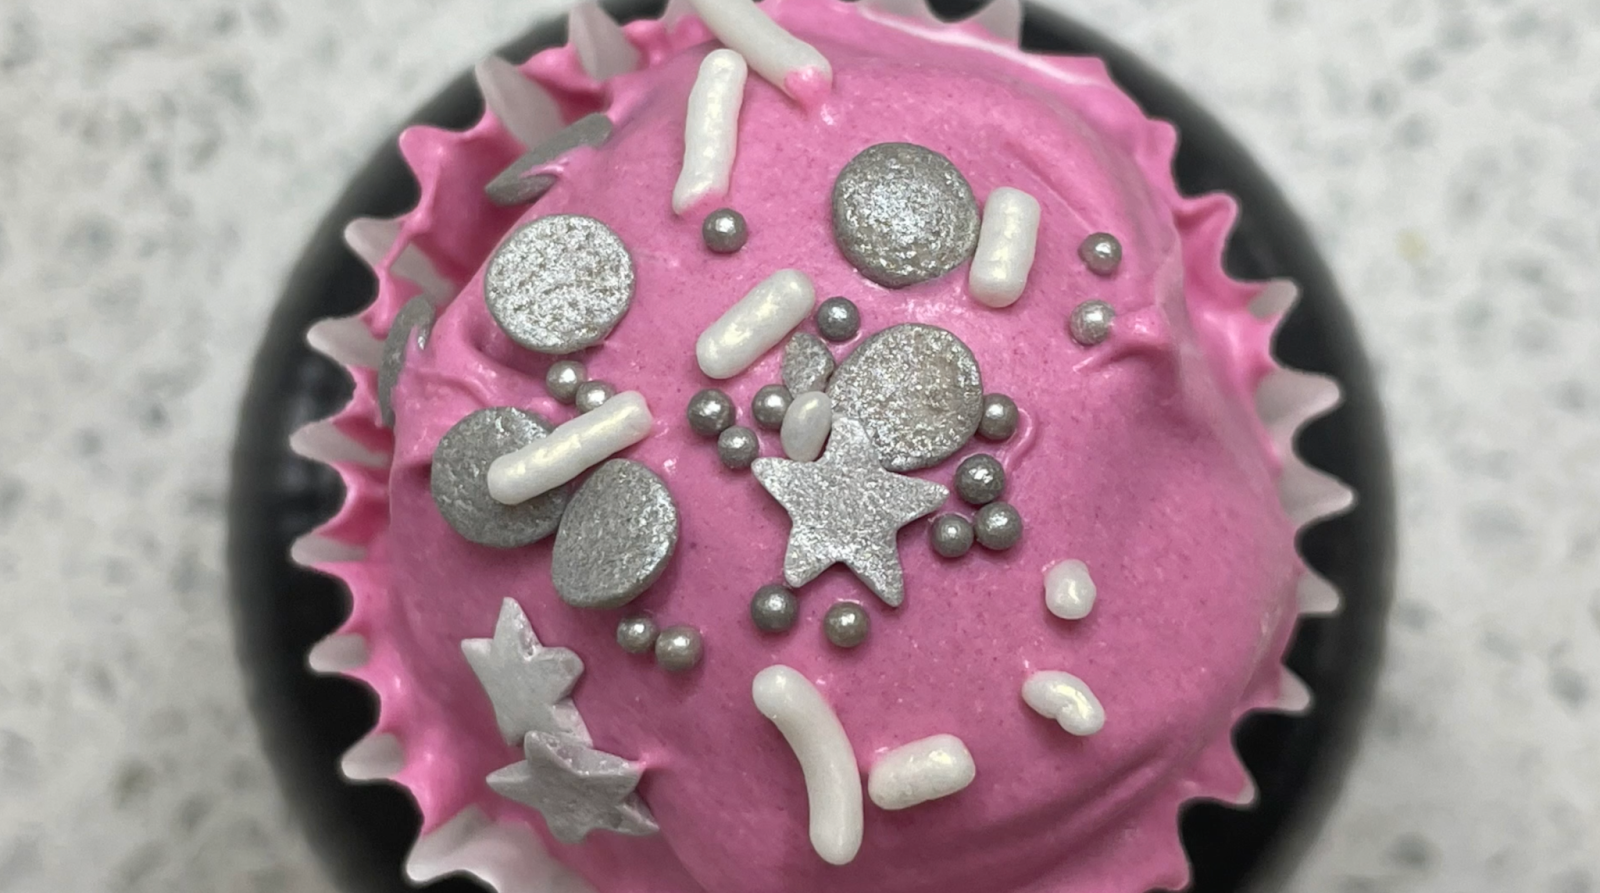
With my tub of food coloring in hand, I added a tiny drop to the white candy melt, transforming it into a lovely light pink-purple hue. You can choose any color that appeals to you, allowing your creative spirit to soar as you craft a unique assortment of cake balls.
Before we start dipping, ensure you’ve placed mini cupcake liners on your countertop for the final presentation. Now, the fun begins! Gently dip the cake balls into the colored candy melt, ensuring they are fully coated in the luscious goodness. Once coated, carefully place each cake ball into one of the waiting mini cupcake liners.
Let Your Creativity Sprinkle
The sprinkles are the pièce de résistance of our cake balls. With the candy melts still wet, we have the perfect opportunity to adhere the sprinkles, adding both a delightful crunch and a burst of extra color to our sweet creations. Feel free to use any type of sprinkles you desire, and watch as your cake balls come to life.
Conclusion
Congratulations! You’ve successfully transformed a simple store-bought cake into a delightful array of colorful cake balls. This quick dessert hack not only showcases your creativity in the kitchen but also provides a delicious treat that will impress your family, friends, or guests. Whether for a special occasion or just a spontaneous indulgence, these cake balls are a delightful way to satisfy your sweet cravings. So why wait? Give this recipe a try and watch as your culinary creativity takes flight with every bite of these scrumptious, eye-catching cake balls. Happy baking!
Sorry, the comment form is closed at this time.