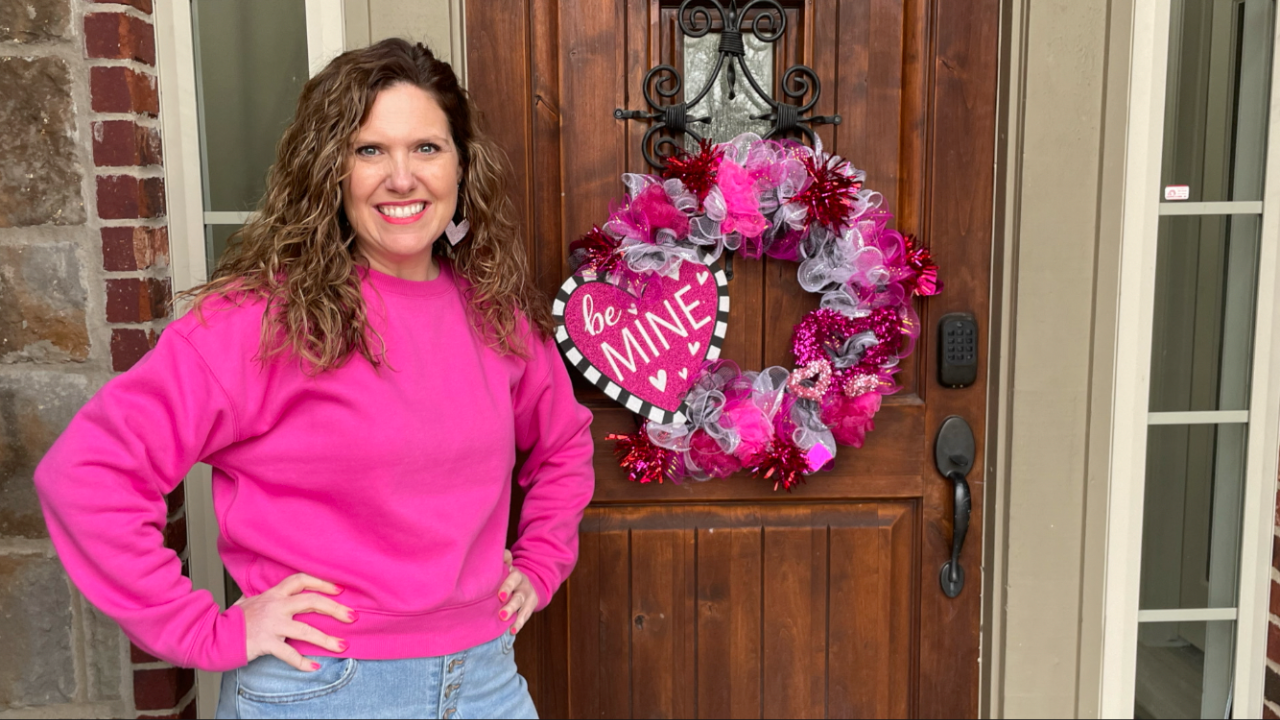
07 Feb Valentine Wreath Made With A Shower Loofah?? Everything from the Dollar Tree
Need a new Valentines’s Day wreath for your door? I did, so I went to my local Dollar Tree and picked up some leftover Christmas decor as well as some Valentine’s Day decor to use for my Valentine’s Day wreath. Dollar tree always has amazing Valentine’s stuff! Let’s take a look at what I picked up initially:
Materials I Picked Up
- Mesh ribbon (I got these for 50 cents at Dollar Tree because they were from Christmas!)
- Valentine’s Day decorative sticks and clips
- Valentine’s Day wooden sign that says “Be Mine”
- Sparkly heart wall decor
- And more!
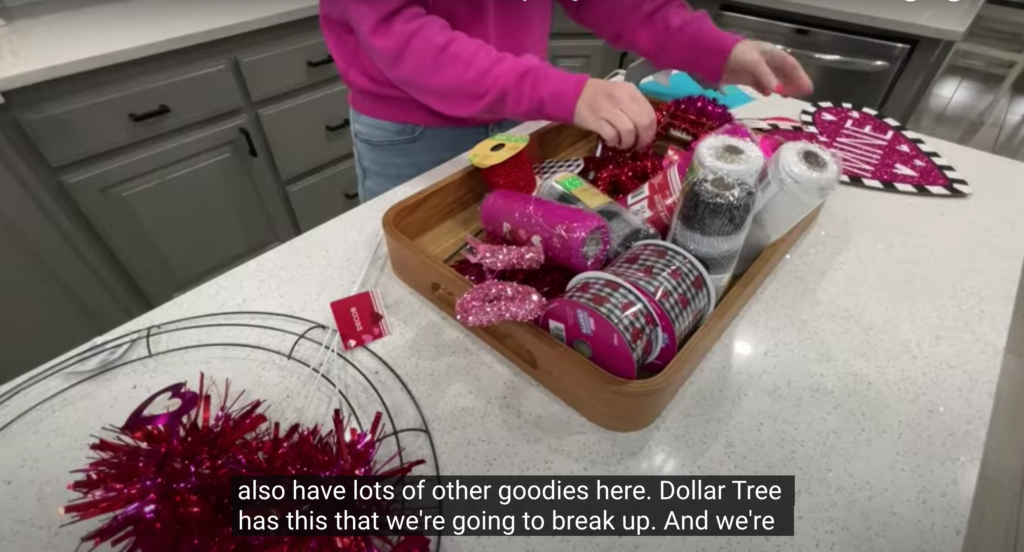
I also picked up:
- A wreath frame from Dollar Tree
- Zip-ties
- Thin, bendable wire
- A loofah from the Dollar Tree
Starting the Process
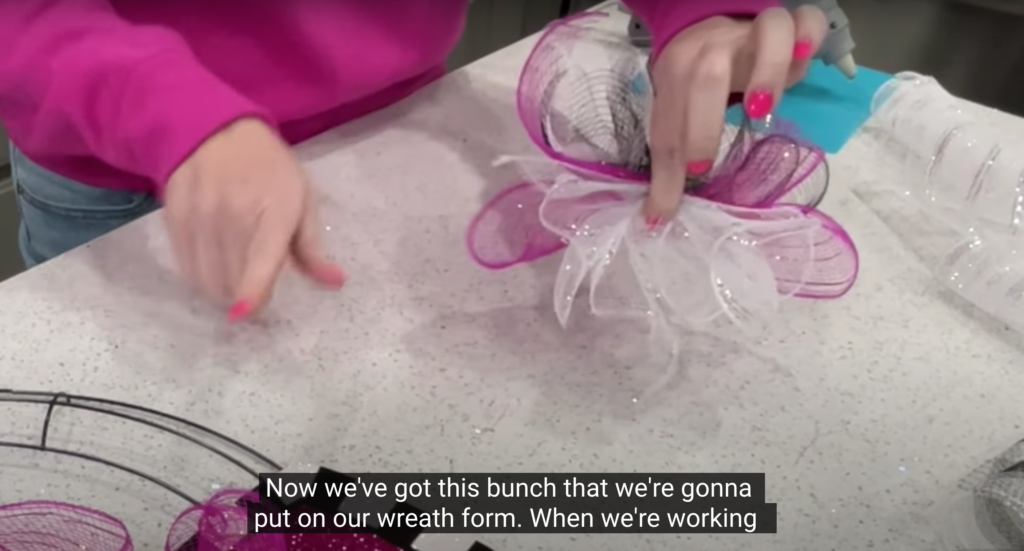
Although I wasn’t sure how I was going to use everything at first, I decided to start with my wreath form and the mesh ribbon. With the mesh ribbon, I had two rolls of black and white ribbon, two rolls of white and silver, and two rolls of hot pink ribbon with a little bit of gold sparkle to them.
You are going to want to unroll these ribbons and cut them into 6-8 inch sections, attach them together in a little bundle, and then start to assemble your wreath. Last year, I made a witch’s hat with tulle, and this is the exact same process.
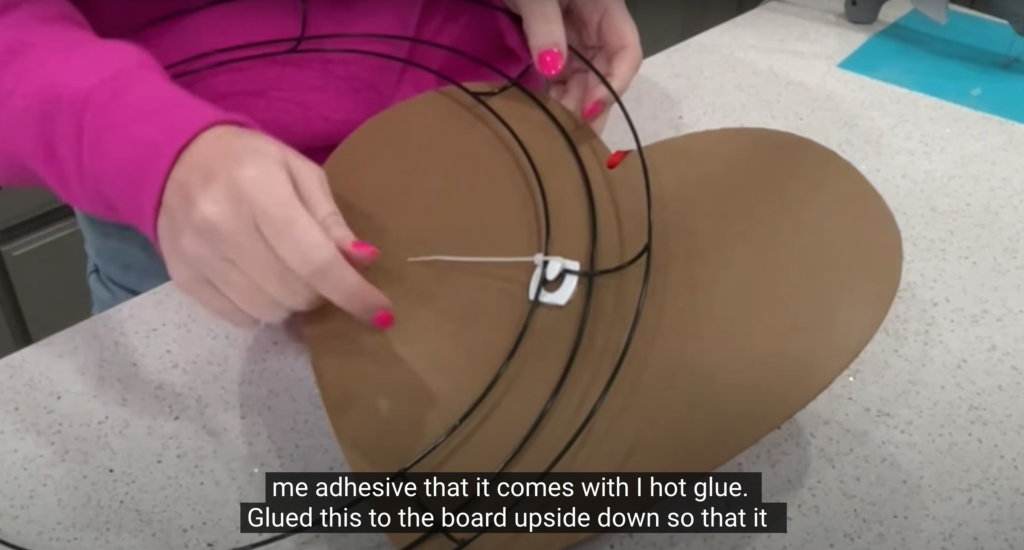
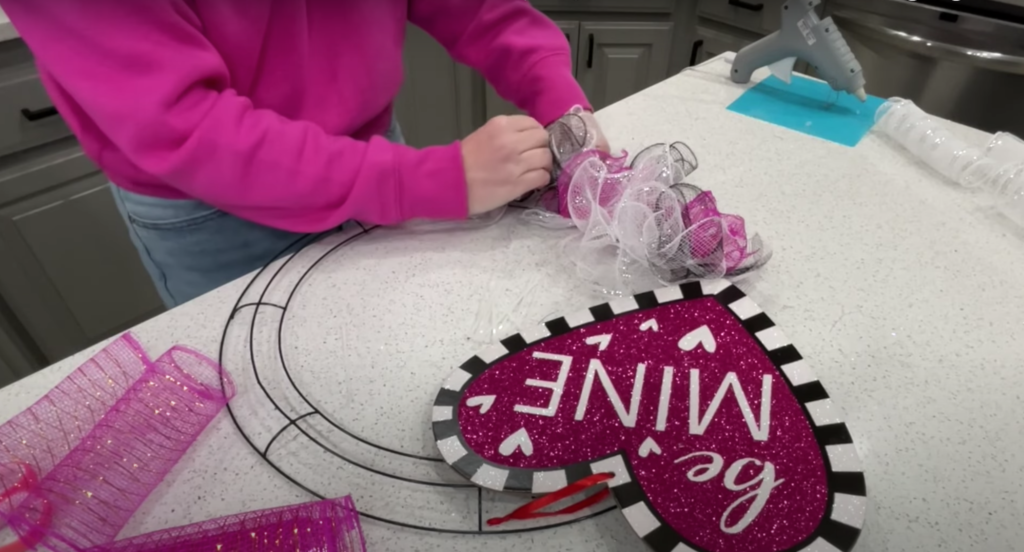
Before starting to attach the ribbon, I really liked the wooden sign I got from Dollar tree that says “Be Mine,” but I had to figure out how to attach it to the wreath form. Once I figured this out, I made a video on Youtube that is more detailed specifically to show this process. However, there is a quick version! The quick version involves using a mini command hook, but instead of using the adhesive that it comes with, I used hot glue to attach it to the back of the wooden sign for added strength. Make sure to place the command hook upside down so it will easily hook onto a metal ring on the wreath form. After you have hooked on your sign, you can attach it with a zip-tie to firmly secure it.
Now that the sign is attached, it is time to finish building out the rest of the wreath. Grab your cut strips of mesh ribbon. Starting with one color, scrunch it up like an accordion, then transfer it to your other hand. Add in a different color next, repeat the process with a third color, and then pinch everything together and attach your bundle to the wreath with a zip tie.
The great thing about using mesh materials is that they are very forgiving. The pieces can be going every which way and it doesn’t look wrong because the mesh material fills up negative space and gives a great foundation for the wreath.
Attaching More Pieces
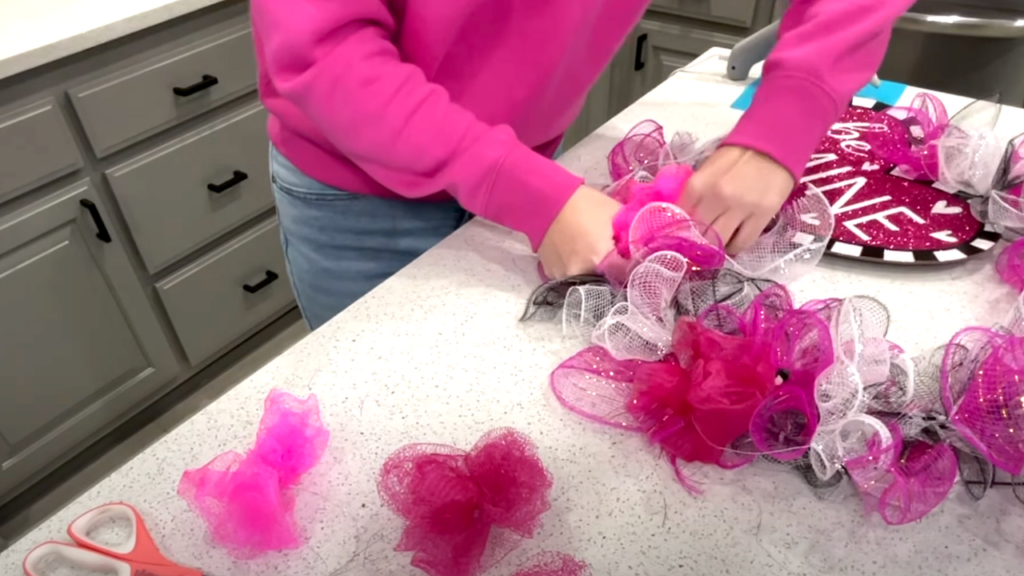
As you attach them, there is really no specific rhyme or reason. As I filled out the wreath, with some pieces I attached them in groups of three as I described above, others in groups of two, and some pieces individually. Do whatever works best for you and gives you the optimal result! Make sure as you are securing down the pieces with zip ties, cut off the extra length on each zip tie so it doesn’t poke you later on. Fill out the entire wreath with the mesh ribbon excluding the area with the wooden sign.
While I was shopping at Dollar Tree, I also passed a bright pink and white loofah and thought that I could probably make it into something, so I bought it! Now that I’ve gotten it home, I am going to deconstruct the loofah, and we are going to see how we can best utilize it in the Valentine’s wreath.
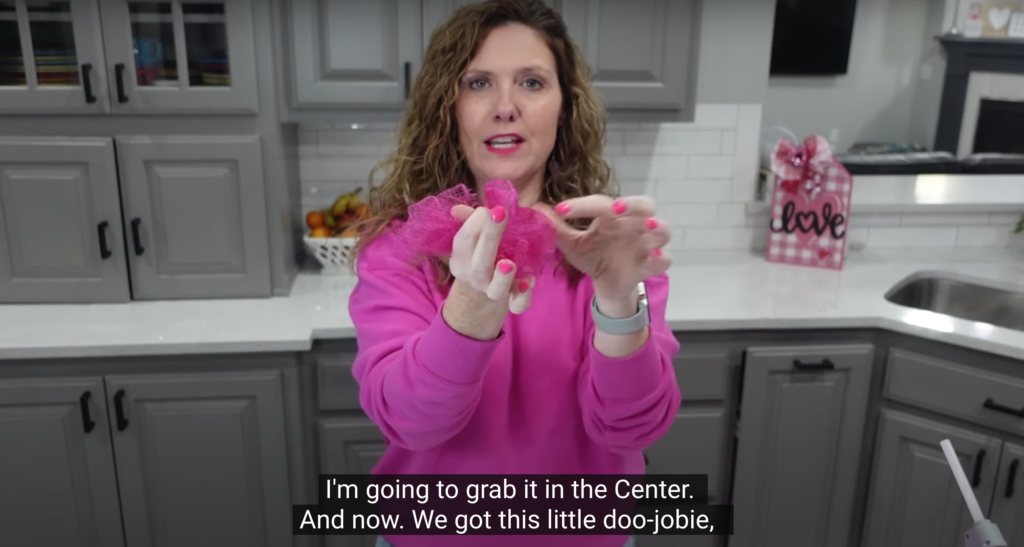
Snip the string holding the loofah together, and long strips of the plastic mesh used in loofahs will be revealed. Cut the loofah strips into 3-4 sections with scissors. After you have done this, open up each section so that a circle has formed, twist and hold the material in the middle, and you will have your very first poof! I chose to bring it all together in the middle with thin, bendable, wire, leaving some extra wire length on each poof so that I can use the wire to easily attach the poofs to the wreath form later. It is always good to have extra dimension and textures in your wreaths, so this will give us some extra oomph.
I decided to attach the loofah poofs I made to add some pops of color to the wreath, fluffing them and spreading them out a bit more before attaching them to the wreath. I want to make sure that they take up as much space as possible and are spread evenly around the wreath for maximum impact. If you want to use zip ties to bring together and attach the loofah poofs, then you can just zip the entire thing to the wreath.
Final Embellishments
All that is left is the fun stuff! We are going to repurpose the little things that we got from Dollar Tree as sparkly embellishments to make the wreath feel complete. From the items I got, I decided to first use a medium-sized sparkly pink heart from a festive heart wall hanging I picked up. I cut the heart I wanted to use out and saved the other two hearts for another project.
This is the part where you really just want to eyeball the placement of everything. I am going to use a couple of zip ties to attach this heart to the wreath frame.
Another couple of items I picked up were some sparkly heart embellishments on wires attached to a metal clip. I decided to use one of these, and I detached the embellishments and wire from the clip so that I could attach the wire to the wreath form easily.
Another couple of items I grabbed at Dollar Tree were some sparkly heart fire-sparkler-inspired sticks. Now I needed to find a fun spot for them on my wreath! First, I cut them apart and then placed them around the wreath to see what looked the best before attaching them. Once they are in the desired position, attach, you can attach yours. These are also wire-based, so you can just wrap the ends of the sticks around the wreath form.
I like a lot of texture in my wreaths, and you can get texture through different fabrics, ribbons, and other unique materials. For this wreath, we mixed the meshed ribbon with the Loofah material, and we’ve also got the wooden sign and all the sparkly items. Mixing it up looks really nice, so don’t be afraid to play!
I hope you enjoyed this DIY project! For more content, you can visit my YouTube channel. You will find lifestyle videos, more DIY projects, easy recipes, and more! My goal is to make your life easier, whether that be affordable DIY crafts, one-pan dishes, or product recommendations. Speaking of, do you like the bright pink sweatshirt I am wearing in this video? You can get one for yourself over at Target!
Sorry, the comment form is closed at this time.